Overview
Gratis Mail routes the email WordPress sends through your own SMTP server instead of the unreliable default PHP mailer, which dramatically improves deliverability. Credentials are encrypted at rest, a built-in test tool confirms the connection, and every message is logged so you can see what was sent and whether it succeeded.
Opening the settings screen
- In the WordPress admin sidebar, hover Settings.
- Click Gratis Mail (URL:
/wp-admin/options-general.php?page=gratis-mail). - Fill in the fields below, then click Save Changes.
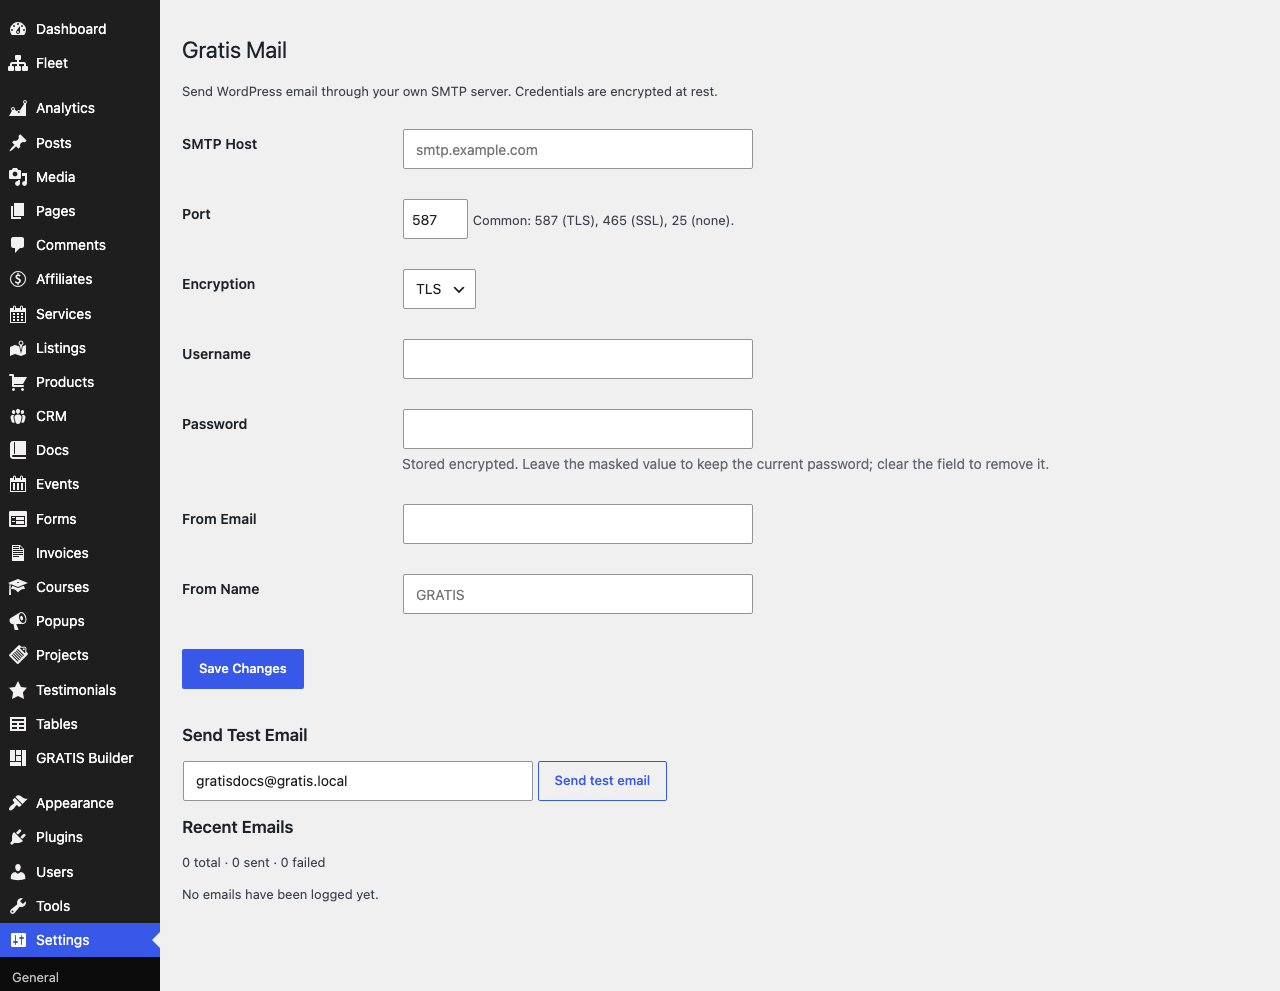
SMTP server
- SMTP Host — your mail provider’s server address, such as
smtp.example.com(a hostname or IP, with nohttps://prefix). Until this is set, WordPress keeps using the default PHP mailer. - Port — the connection port. Common choices are
587(TLS),465(SSL) and25(no encryption); the default is587. - Encryption — the transport security:
TLS,SSLorNone. Match this to the port your provider expects.
Authentication
- Username — the login for your SMTP account, usually the full mailbox address.
- Password — the SMTP password or app password. It is stored encrypted; a masked placeholder means a password is saved. Leave the mask untouched to keep the current value, or clear the field to remove it.
Sender identity
- From Email — the address messages are sent from. Use an address on a domain your SMTP provider is authorised to send for, or mail may be rejected.
- From Name — the display name recipients see; defaults to your site name.
Testing and the email log
Use Send Test Email to fire a message to any address and confirm your settings work. Below it, the Recent Emails log lists each message with its status, recipient, subject and time, plus totals for sent and failed — the first place to look when delivery problems occur.
Recommended starting point
- Enter the Host, Port and Encryption from your mail provider (commonly
587+TLS). - Add the Username and Password, and set a From Email on your own domain.
- Save, then run Send Test Email and confirm it shows as sent in the log.